Every virtual machine that is hosted on Hyper-V 2019 probably requires a virtual network card in order to communicate with the rest of the network. In order to do so, we would need to create a virtual switch and assign it to the virtual machine. There are three different virtual switches on the Hyper-V including private, internal and external. The private network switch provides only communication between virtual machines that are hosted on a physical server. Next to that, the internal switch provides communication between virtual machines and Hyper-V host. The last, but not the least one is the external switch. An external switch is bound to the physical network card and provide communication with the entire network. After we create a virtual switch, the next step would be to assign a virtual switch to the virtual machine. Which switch will we assign? It depends on the virtual machine’s use case.
Some IT Admin is experiencing problems when creating virtual switches on the Hyper-V, regardless if they are trying to create it via GUI or Powershell. One of the error is known as “Error applying virtual switch properties changes. Failed while adding virtual ethernet switch connections.” The details show the GUID of the adapter, with the final text, “The system cannot find the file specified. (0x80070002). The same issue occurs not only on Hyper-V 2019 but also on Hyper-V 2016 and Hyper-V 2012.
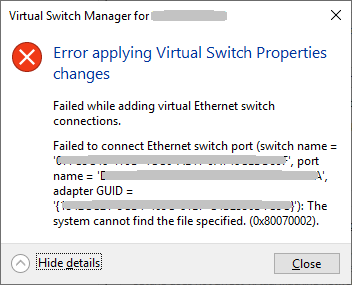
There are a few reasons why this problem occurs, but many of them are pointing to a problem with the network card. We will focus on two of them and walk you through solutions that have helped IT admins to solve a problem. It includes updating the network card, deleting NIC references and re-adding Hyper-V role. So, let’s start. If solution 1 doesn’t solve your problem, please try with solution 2.
Solution 1: Update network card drivers
In our case, we are using physical server HPE ProLiant ML350 Gen10 Server. In order to update the driver for the network card, we would need to access the manufacturer website and download an official driver for the network card. As this server uses Intel’s network card, we can also download it on Intel’s website.
Solution 2: Reinstall Hyper-V role and reset NIC references
- Log in or connect to Windows Server 2019 where you installed Hyper-V role
- Open Server Manager
- Click on Manage and then choose Remove Roles and Features
- Click on Next under Before you begin
- Select the destination server and click Next
- Deselect Hyper-V under Remove server roles and then click Remove Features
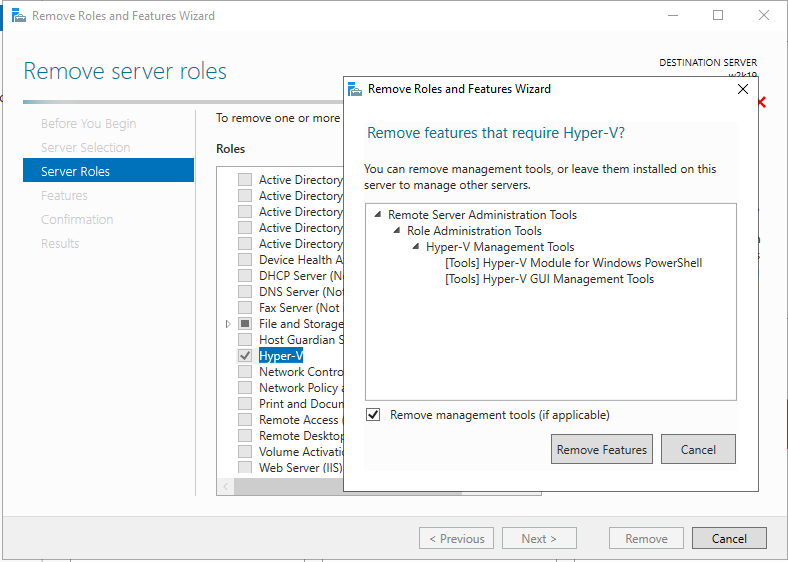
- Click Next
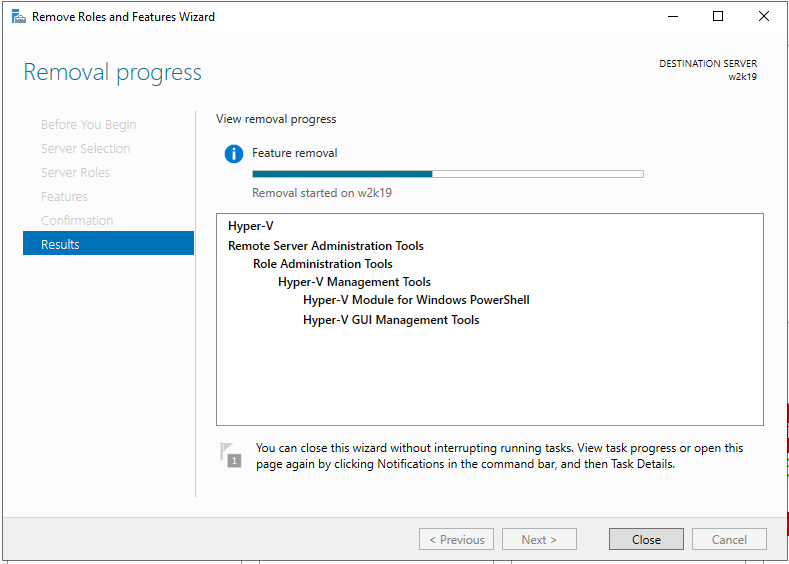
- Click Next under Remove features
- Select Restart the destination server automatically if required
- Click Yes to confirm and then click Windows will automatically restart.
- Log in or connect to Windows Server 2019 where you installed Hyper-V role
- Right click on Start Menu and click Windows Powershell (Admin)
- Type netcfg -d and press Enter. This will delete all the NIC references, so be sure that you physical access to the server or have a good iLO or other management connection.
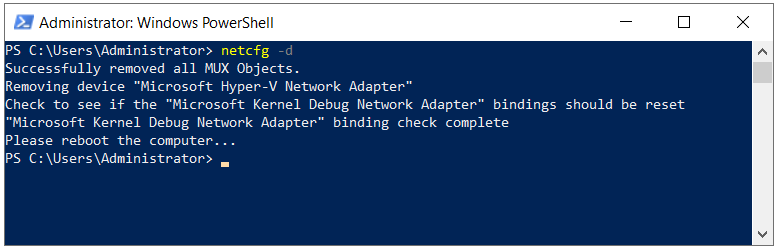
- Restart Windows Server 2019
- Log in or connect to Windows Server 2019 where you installed Hyper-V role
- Open Server Manager and install Hyper-V by following the same procedure as we use for removing the role. You will only need to select Hyper-V role.
- Left click on Start Menu and search for Hyper-V Manager
- Open Hyper-V Manager
- Navigate and open Virtual Switch Manager on the right side of the Hyper-V Manager window
- Select External under What type of virtual switch do you want to create and then click Create Virtual Switch
- Type the name of the external switch
- Choose network card under External network
- Click Apply and then OK
- Navigate to the virtual machine where you would like to assign a new virtual switch
- Right click on the virtual machine and click Settings
- Click on Network Adapter
- Choose the External virtual switch under Virtual Switch
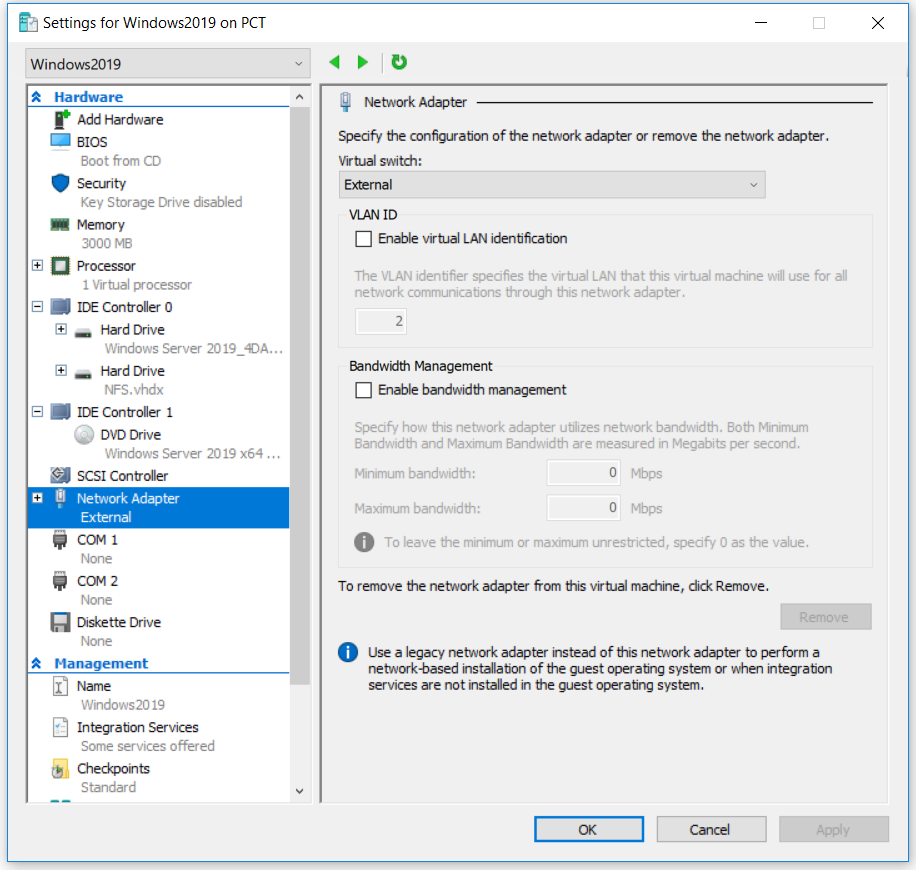
- Click Apply and then OK
- Add IP address (if you are not using DHCP)
- Enjoy working with Hyper-V and virtual machines
Comments
Post a Comment