Surface Pro 4 is designed and marketed by Microsoft. It is a 2-in-1 detachable computer with a touchscreen and a keyboard. It is a great product with ease of access its main aim. However, many users reported that their touchscreen didn’t work as expected. Sometimes while in operation the touch screen would stop responding all of a sudden causing immense trouble.
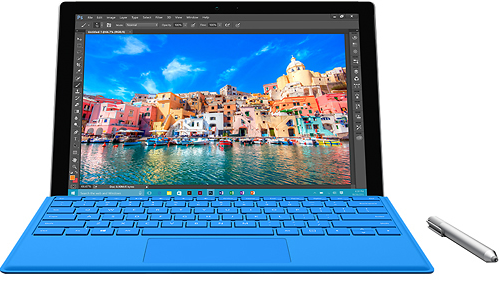
The problem might be due to a number of reasons such as the lack of latest Windows update, outdated drivers or incorrect calibration etc. We have listed down a number of solutions for you to try. Take a look.
Solution 1: Performing a Hard Reset
Majority of the users reported that performing a hard reset of the device fixed the problem of their touchscreen not working. It is possible that the current configuration of your touch isn’t correct which is primarily causing you the problem. We can try shutting the device down forcefully and check if this makes any difference.
- Press and hold the Power button of your device for 30 seconds before releasing it.
- Press the volume up button and the power button together and hold them for 15 seconds. (Do not release them when you see the logo appearing in front of you)
- Leave your Surface Pro idle for more than 15 seconds.
- Start your device normally and check if the problem got solved.
Solution 2: Checking for System Updates
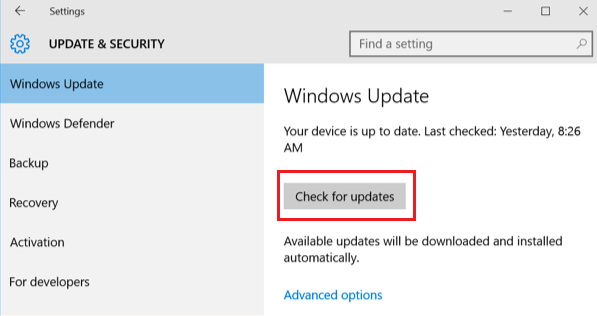
If you haven’t checked your Windows for potential updates, you should check right away. Each update consists of more support for hardware components, bug fixes, and even new functionalities. It can be possible that the issue you are facing is already addressed in the update.
- Click Start and type in the dialogue box “Settings”. Click the application that returns in the search results. Click on the “Update and security” button.
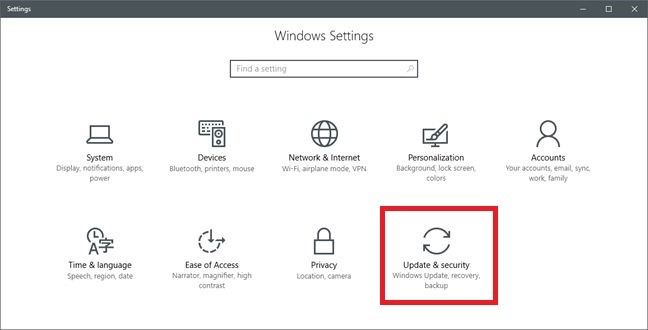
- Here you will find “Check for updates” in the “Windows Update” tab. Now windows will check for any available updates and install them after downloading.
Solution 3: Updating Touch Screen Driver
The problem might also be present due to outdated/corrupt touch drivers on your computer. We can try manually updating the drivers on your computer and check if the problem still persists. Do note that you can always try updating the drivers automatically before attempting to update them manually as described here. Just select the first options instead of the second one in step 3 to update them automatically.
- Press Windows + R to launch the Run Type “devmgmt.msc” in the dialogue box and hit Enter. This will launch your computer’s device manager.
- Navigate through all the hardware, and right click on the device, and select “Update driver”.

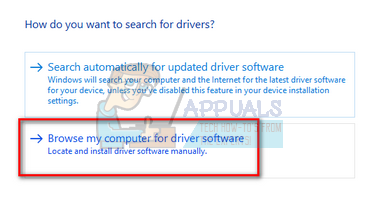
- Now Windows will pop a dialogue box asking you which way do you want to update your driver. Select the second option (Browse my computer for driver software) and proceed.
Select the driver file you downloaded using the browse button when it appears and update it accordingly.
- Restart your computer after the update and check if the problem gets resolved.
Solution 4: Calibrating the Touch Screen
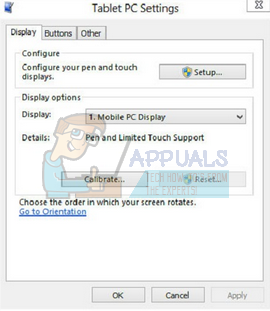
Another workaround for this problem is to correctly calibrate the touchscreen. Each touch screen needs to be calibrated every once in a while for it to function properly as expected. The calibration will take a few moments before you are able to use your computer again.
- Press Windows + S to launch the search bar, type “Calibrate” in the dialogue box and open the application which returns in the result.
- Click the button “Calibrate” and follow the on-screen instruction to calibrate your display. Restart your computer and check if the problem got solved.
Solution 5: Resetting the Device
If all the above methods don’t work, we can try resetting the device. You will always have the option whether to keep your files and folders when performing the reset. In any case, you should always backup the data stored on your computer before moving on to the solution.
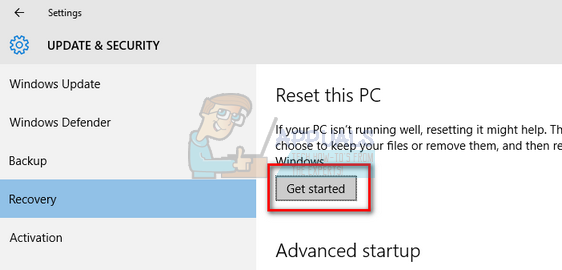
- Press Windows + S, type “Reset” and open the application.

- Click on “Get started” present under the heading of “Reset this PC” for the process to start.
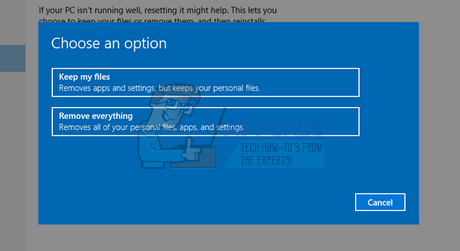
- Now Windows will ask whether you want to keep your files or remove everything. The choice depends on you. If you have recently purchased your computer and there aren’t many files, you can easily back them up and select “Remove everything”. Otherwise, you can select the first option.
Comments
Post a Comment