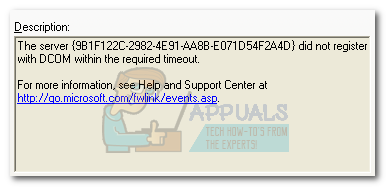
The error “server did not register with DCOM within the required timeout” is signaling that one or more DCOM (Distributed Component Object Model) software is failing to register itself in a reasonable period of time.
A DCOM software needs to register itself as a server of sorts so that other programs or machines can call on its functionality remotely. If it fails to register or if it doesn’t do it within the predetermined time frame, the “server did not register with DCOM within the required timeout” will be displayed in the Event Viewer.
What is DCOM (Distributed Component Object Model)
DCOM is a set of concepts and program interfaces that allow a client program object to request one or more services from a so-called server program. DCOM is derivated from the Component Object Model (COM), which makes it possible for client and server apps to communicate on the same machine.
A server failing to register with DCOM due to timeout is quite routine, so the error message can turn out to be harmless. However, most users discover the error in their Event Viewer after a serious symptom like their hard disk being locked at 100% usage or no sound across all applications.
Pinpointing the exact cause of this issue is not easy to identify, but there are a few scenarios that will often cause this issue. Here are some components that are likely to cause this particular error:
- Conflicting or missing credentials
- Firewall settings
- Conflicting DCOM settings for the local machine and application
If you’re currently struggling with this particular problem, start troubleshooting your issue with the potential fixes below. Please follow each method in order until you encounter a fix that resolves your issue.
Method 1: Change startup type of Function Discovery Resource Publication
The Function Discovery Resource Publication is a Windows service responsible for publishing the computer and it’s attached resources, so they can be discovered over the connected network.
Although it’s theoretically an important component, some users have managed to fix the ” “server did not register with DCOM within the required timeout” error by changing the startup type from Automatic to Automatic (Delayed).
Note: Keep in mind that this will not hinder the functionality of DCOM in any way – it merely delays the service that is potentially responsible for the problem. DCOM timeouts are known to happen at startup when the system is busy loading the necessary components. If that’s the cause of the issue, this will fix it.
Here’s a quick guide to changing the startup type of the Function Discovery Resource Publication service:
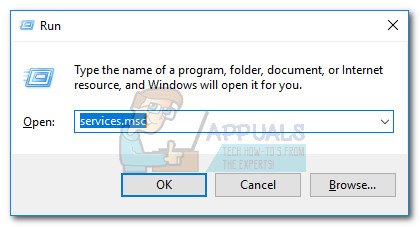
- Press Windows key + R to open a Run Window. Type “services.msc” and hit Enter to open the Serviceswindow.
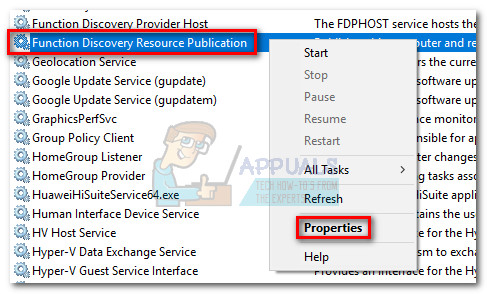
- Scroll down through the services name and locate Function Discovery Resource Publication. Right-click on it and choose Properties.
- In Properties under the General tab, expand the drop-down menu near Startup type and set it to Automatic (Delayed Start).
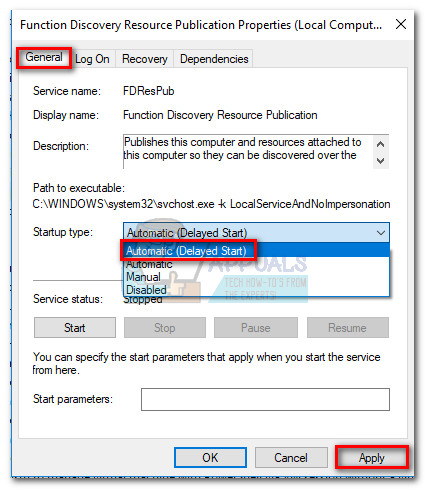
- Hit Apply and reboot your system. At the next startup, see if the issue has been resolved.
Method 2: Turn Off Updates from more than one place (Windows 10, 8.1)
After thorough investigations in the DCOM System logs, some users have discovered that a certain Windows Update setting was causing the issue. As it turns out, enabling Updates from more than one place (Allow downloads from other PCs) in the Advanced settings menu of WU might produce the “server did not register with DCOM within the required timeout” error. Depending on your initial setup, you might have this option enabled by default.
Here’s a quick guide to disabling Updates from more than one place from Delivery Optimization:
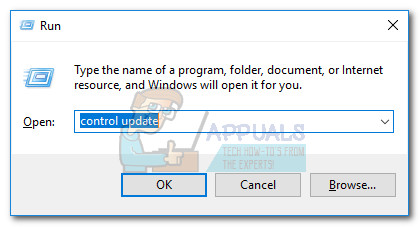
- Press Windows key + R to open a Run Window. Type “control update” and hit Enter to open the Windows Update window.
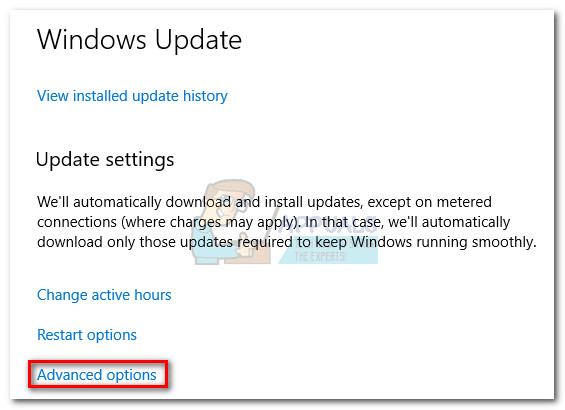
- In the Windows Update screen, scroll down to Update settings and click on Advanced options.
- In Advanced Options, click on Delivery Optimization.
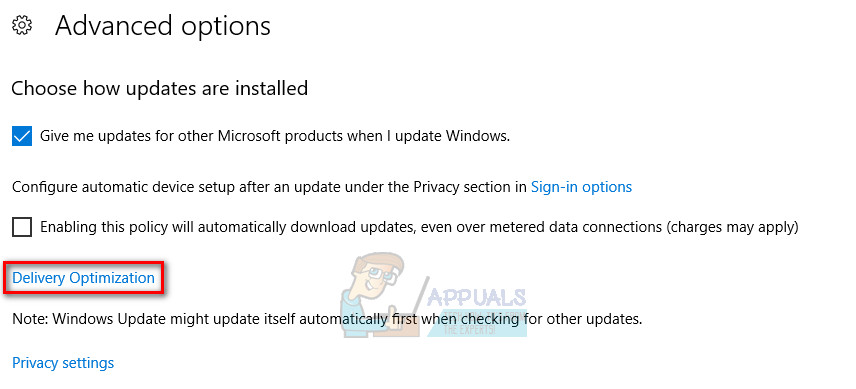 Note: If you don’t have the Creators Update, click on Choose how updates are delivered (under Choose how updates are installed)
 - Set the toggle next to Allow downloads from other PCs to OFF.
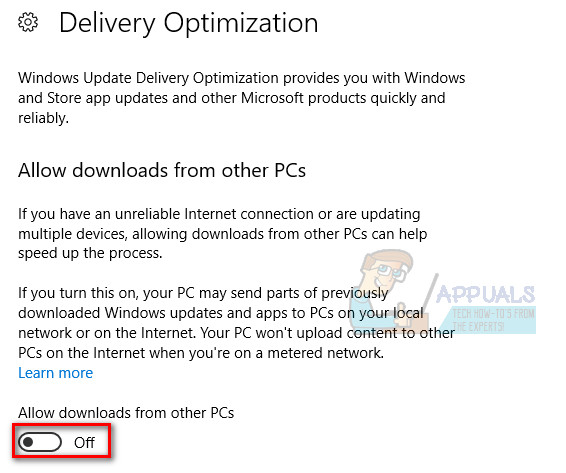 Note: If you don’t have the Creator’s update, disable the toggle under Updates from more than one place.
Method 3: Fixing Windows Store certificate
As it turns out, the “server did not register with DCOM within the required timeout” error can also be caused by a certification belonging to Windows Store Apps. Some users managed to fix the issue by troubleshooting problems related to Windows Store. If this is the underlying cause of the issue, using the Windows Store Apps troubleshooter will automatically replace the faulty certificate.
Here’s a quick guide to using the Windows Store Apps troubleshooter:
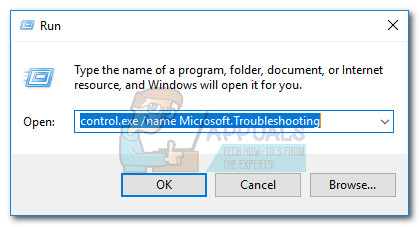
- Press Windows key + R to open a Run Window. Type “control.exe /name Microsoft.Troubleshooting” and hit Enter to open Windows Troubleshoot.
- Scroll down to Find and fix other problems, select Windows Store Apps, then click on Run the troubleshooter.
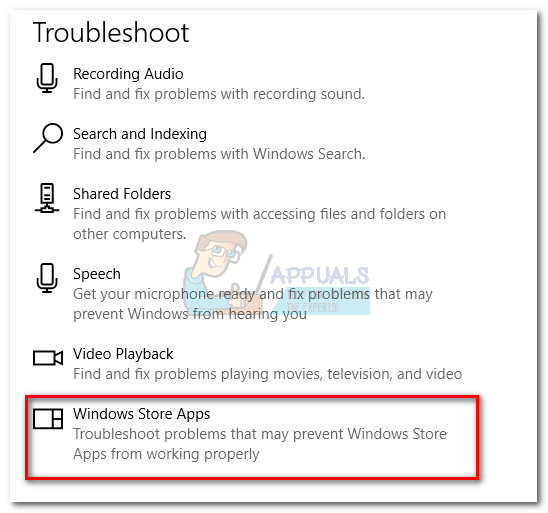
- Wait for the scan to complete, then follow with the-on screen prompts to apply the fix for the Windows Store certificate.
Method 4: Disable 3rd party firewall
If you use an external firewall, temporarily disable it, reboot your computer and see if the issue is fixed. As some users affected by this issue have pointed out, some 3rd party firewall settings might prevent DCOM server programs from sharing information across your machine.
If you find that disabling your firewall was indeed causing the issue, use the built-in Microsoft Security firewall or go for a different 3rd-party solution.
Method 5: Disable DCOM from Component Services
If all of the above methods have failed, you can probably remove the error by disabling Distributed COM in Component Services. But doing so disables communication with components hosted on other computers. Depending on the software installed on your computer, this might or might not affect your system.
If your computer is part of a network, the DCOM wire protocol will be needed to communicate with components on other computers. All Windows-based systems are initially configured to enable DCOM. Although you can disable DCOM, it might not have a beneficial effect on your computer.
Note: Use the following procedure to disable DCOM and see how your system reacts to it. If you find that it doesn’t help you or it produces unexpected problems with other applications, revert to the steps below and re-enable DCOM. Furthermore, if you disable DCOM on a remote computer, you will not be able to remotely access the computer again to re-enable DCOM. In that case, you’ll need to gain physical access to that computer.
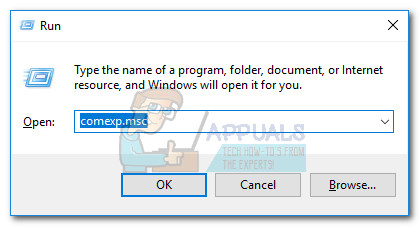
- Press Windows key + R to open a Run window. Type “comexp.msc” and hit Enter to open Component Services.
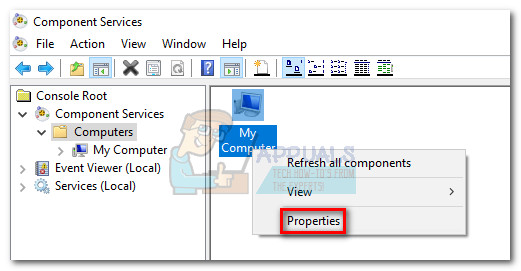
- In the console tree, navigate to Computer Services > Computers, right-click on My Computer and select Properties.
- In My Computer Properties, go to Default Properties, uncheck the box next to Enable Distributed COM on this computer and hit Apply to register the changes.
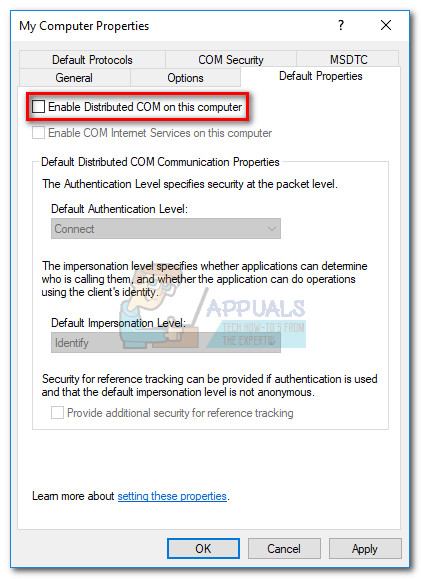
After you disable DCOM, reboot your system and monitor Event Viewer for any new occurrences of the “server did not register with DCOM within the required timeout” error. In the event that you find that some applications are affected by this issue, use the steps above to re-enable Distributed COM.
Comments
Post a Comment