
How to Enable the Legacy Boot Menu in Windows 10

Anyone who has dual-booted Windows 10 with Windows 7 will know that Windows 10 has the modern graphical bootloader, not the classic text-based bootloader from Windows 7 that we all knew and loved. While the folks at Microsoft might think that the graphical bootloader is a step forward and is better than the text-based bootloader, most Windows users will agree that the graphical bootloader spruces things up a bit too much and, for lack of a better phrase, is just not what they are used to.
In addition, to top it all off, Windows 10’s graphical bootloader performs an additional reboot every single time you choose to boot into Windows 7 instead of Windows 10, and this can be pretty annoying and time-consuming. However, thankfully, anyone who dual boots Windows 10 with Windows 7 can save themselves from the menace that is the graphical bootloader by simply switching to the classic Windows 7 bootloader (or the Legacy bootloader). Yes, that’s right, it is entirely possible for you to switch to the beloved text-based bootloader from Windows 7 that provides you with a list of installed Operating Systems from which you can choose which OS you want to boot into.

Replacing Windows 10’s graphical boot manager with Windows 7’s Legacy bootloader is a pretty simple process, and the following are the exact steps that you need to perform in order to do so:
Right-click on the Start Menu button to open the WinX Menu or Hold the Windows Key and Press X
Click on Command Prompt (Admin) to launch an elevated Command Prompt.
Type the following into the elevated Command Prompt and press Enter:
bcdedit /set “{current}” bootmenupolicy legacy
Exit the elevated Command Prompt.
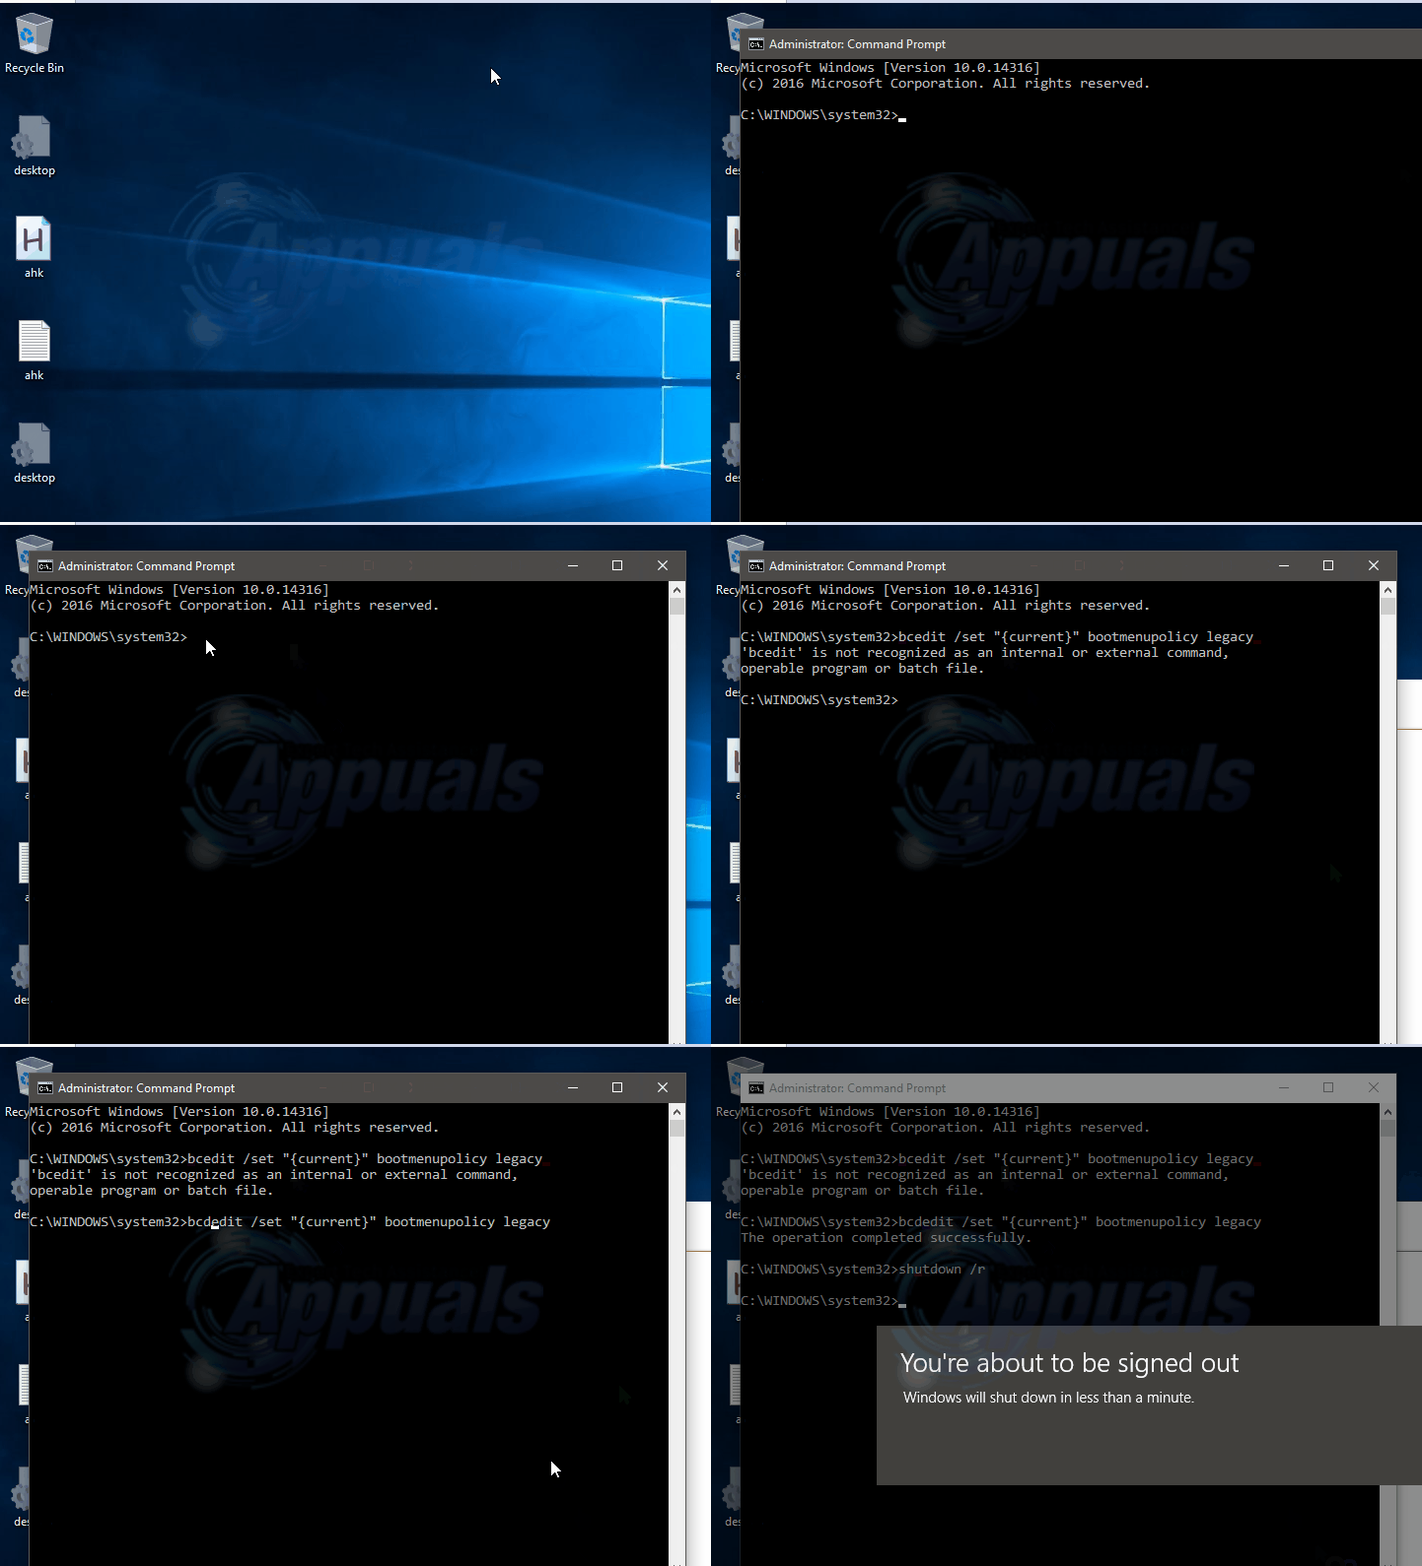
windows 10 legacy boot menu
When you reboot your computer, you will see that your bootloader has been switched to Windows 7’s Legacy
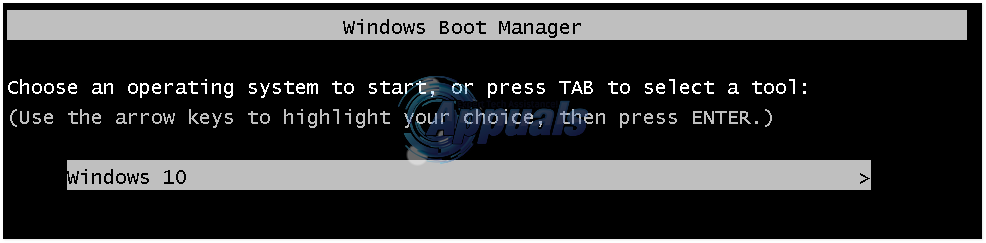
legacy boot menu
Note: To switch back to the graphical bootloader, simply repeat steps 14, but, this time, type the following into the elevated Command Prompt:
bcdedit /set {default} bootmenupolicy standard
TIP: If none of the Methods have resolved the issue for you, we recommend using Reimage 

Comments

Popular posts from this blog

How to Fix Windows 10 Pin Issues when Logging In

Windows 10 provide a very convenient way of logging in to your Windows using a pin code. However, some users are experiencing problems with the Windows 10 pin login. After a Windows Update, users can’t sign in using their previous pin code. And this isn’t related to users forgetting their pin codes. It seems like their old pin code has been removed from the Windows and their PCs aren’t recognising it. Now, there are a lot of scenarios of this. Some people can’t sign in because the system doesn’t recognise their PIN. On the other hand, some people can’t even enter their pin because there isn’t a pin option available for them. What Causes the Pin to Stop Working? Here is a list of things that can cause this issue A bug in the Windows Update that might have broken the PIN sign in option Corrupt files in the Ngc folder Usually it happens after a Windows Update so it’s a bug that breaks the PIN sign in option. Tips Before you dive deep in to the methods given below...

How to Fix the ‘Failed to Acquire the VirtualBox COM Object’ Error

Several users are reporting that they are unable to launch VirtualBox. The critical error message that comes up is  “Failed to acquire the VirtualBox COM object. The application will terminate”.  In some cases, the error is also accompanied by a second error message pointing towards the problem. The issue does not seem to be specific to a certain Windows version since it’s confirmed to occur on both Windows 8.1 and Windows 10. Failed to acquire the VirtualBox COM object. The application will now terminate. What is causing the ‘Failed to Acquire the VirtualBox COM Object’ error? We investigated this issue by looking at various user reports and the repair strategies that are commonly deployed successfully in this particular scenario. As it turns out, there are multiple culprits that might end up triggering this issue: VirtualBox is not installed with admin access  – Virtualbox is one of those software products that will require you to install them with a...

Fix: System Found Unauthorized Changes on the Firmware, Operating System or UEFI Drivers

Several users are struggling with the  System found unauthorized changes on the firmware error  at every startup or when trying to take their computer out of hibernation mode. Most affected users report that the issue started occurring after they installed some pending Windows updates. The issue is mostly encountered on Windows 7. The system found unauthorized changes on the firmware, operating system or UEFI drivers. Press [OK] to run the next boot device, or enter directly to BIOS Setup if there are no other boot devices installed. What is causing the System found unauthorized changes on the firmware error We investigated this particular issue by looking at various user reports. This error will occur whenever your system is checking the firmware one some computer hardware parts as part of a new security feature. To be precise, the error is occurring because not all Windows versions will support this new security feature. As it turns out, there are sev...