The Hamachi application throws the ‘VPN status error’ when something is blocking it from tunneling properly. This occurs when the Hamachi service is not functioning properly or any third-party VPN clients installed on your system is preventing it from tunneling properly. Hamachi is a VPN or virtual private network application that allows users to connect directly to a different computer across the internet. It makes a virtual LAN between the computers on the Internet. Thus, enabling users to perform a wide range of tasks like sharing files etc.
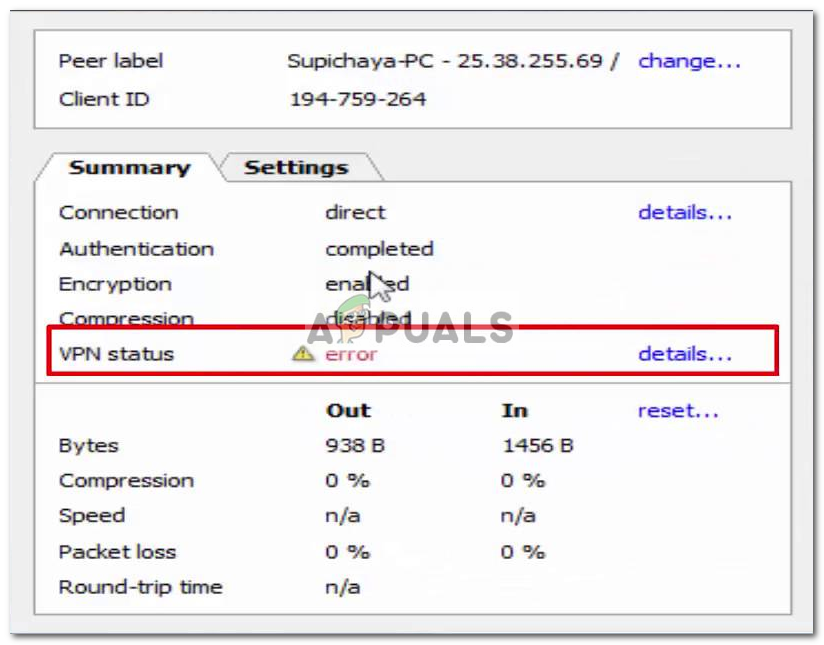
In some cases, when you start up your Hamachi client, your status icon is red instead of green. This usually indicates that you have a problem with your internet due to which the Hamachi cannot connect with its servers. The solution for this error is just to make sure your internet is working fine and reconnect to your internet. However, at times, when you are using Hamachi, your computer’s status icon is yellow instead of green. This is an indication of a tunneling error and it means that your computer is not tunneling properly with the other computers of the network.
What causes the Hamachi VPN Status Error?
The cause of the issue can vary depending on various scenarios. However, most of the times, it is caused due to the following reasons:
- Hamachi Tunneling Service: The error occurs when the Hamachi Tunneling service is not operating properly. If the service is not working properly then the client which depends on the service will automatically not function and hence it will throw the said error.
- Third-Party VPN Clients: In some cases, the error can also be caused by the third-party VPN clients that you have installed on your system. The clients might restrict the application from tunneling properly due to which the error pops up.
The solutions for this error are listed below. Since every such error might have a different cause, so all the solutions are listed. You should try each of them until your problem is fixed.
Solution 1: Disable and Enable Hamachi Virtual Adapter
The first solution that you can implement is trying to disable and then enable the Hamachi virtual adapter that is created when you install the application. Here’s how to do it:
- Open up the Control Panel from the Start Menu.
- Go to Network and Sharing Center (located in Network and Internet).
- On the left-hand side, click ‘Change adapter settings’.
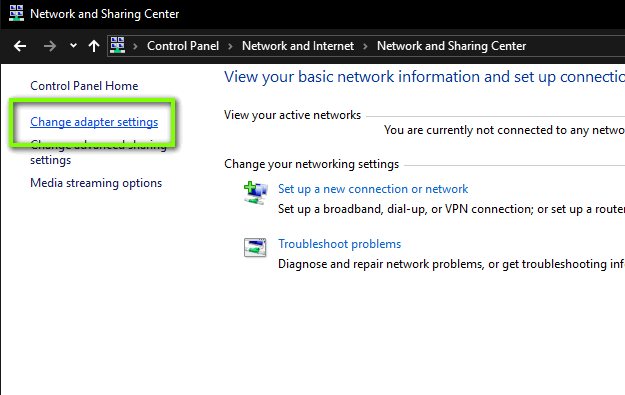
Network Settings - Right-click the Hamachi Network Adapter and select Disable.
- Afterward, enable it again by right-clicking and selecting Enable.
Solution 2: Restart the Hamachi Tunneling Engine Service
As we have mentioned above, the problem often occurs when the Hamachi Tunneling service is not functioning properly. As a result, the client is not able to tunnel correctly. In such a case, you will have to restart the service. Here’s how to do it:
- Press Windows Key + R to open the Run dialog box.
- Type in services.msc and then press Enter.
- Now, look for the Hamachi Tunneling Engine service, right-click on it and select Stop.

Windows Services List - Start the service again and see if it works.
Solution 3: Remove other VPN clients
Sometimes, the error can be caused by VPN applications interfering with each other processes so it is always a good idea to remove other VPN applications if you don’t need them. Therefore, uninstall any third-party VPN clients that you have installed on your system and then try using the Hamachi client to see if it resolves the issue. If it does, you will have to consider getting another VPN.
Solution 4: Uninstall and Reinstall Hamachi
Finally, if you are facing the problem even after trying all of the above solutions, you can uninstall Hamachi and Reinstall it. Hopefully, doing this will fix your problem because it’s going to renew your Hamachi application. Here’s how to uninstall the client:
- Open up the Control Panel from the Start Menu.
- Click Uninstall a program located under Programs.
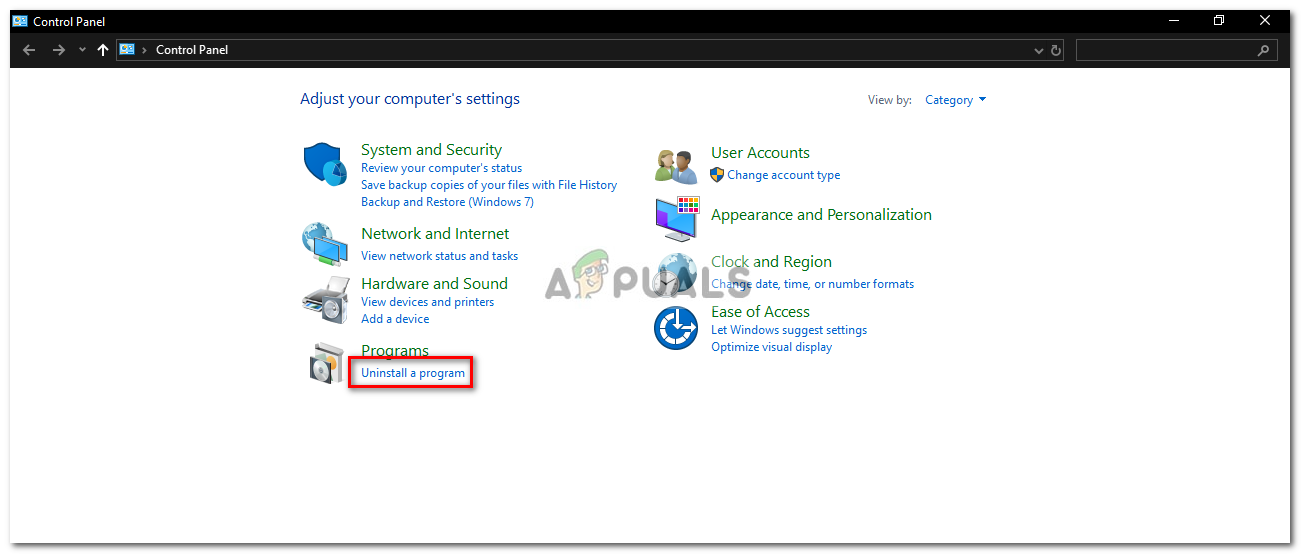
Control Panel Home - Locate the Hamachi client in the list and then double-click on it to uninstall the application from your system.
- Afterward, download the client again from their website, install it and see if it starts working.
Comments
Post a Comment